Importing Contacts
Upload a CSV file to add multiple contacts at once.
Overview
This section includes instructions for uploading a CSV (excel) file containing contacts.
To import a CSV (excel) file with contacts**:**
1. Go to Contacts from your dashboard -> click Add Contacts -> Import Contacts.

2. Choose a CSV file from your computer.
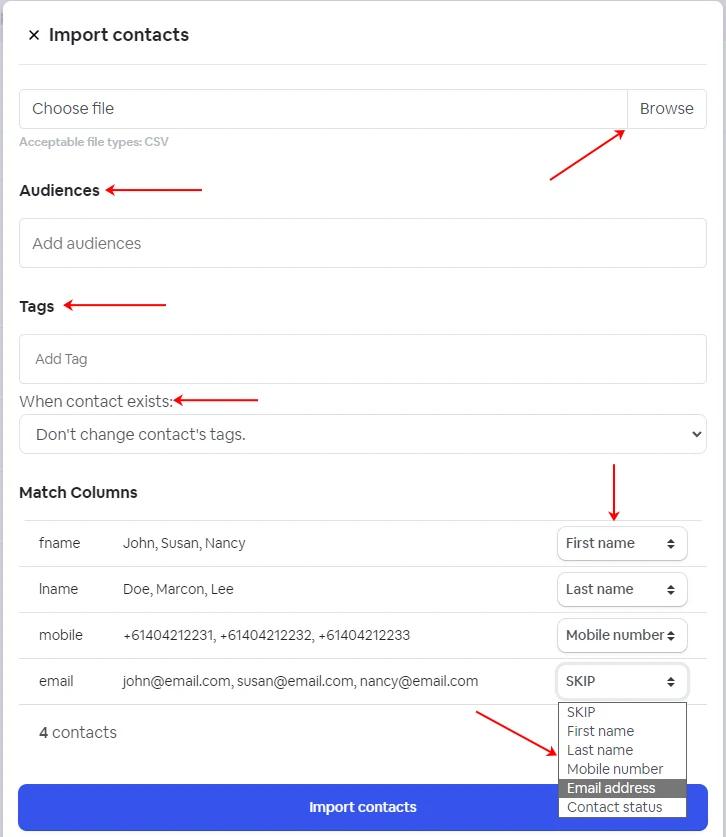
3. You can add all the contacts to a specific Audience or add tags to your contacts (if applicable).
NOTE: all imported contacts will be automatically assigned to the System default segments All Customers & All Contacts.
Tag option
This dictates what to do with the supplied tags if the contact already exists.
| Value | Description |
|---|---|
| 1 | Don't change contact's tags, new tags won't be added. |
| 2 | Don't change the contact's existing tags, but add the new tags listed above. |
| 3 | Remove all contact's existing tags & add all tags listed above. |
4. Match columns. From the dropdown menu, choose the option that corresponds with the contact details from your CSV file, such as first name, last name, phone number, and email address.
Available options
| Key | Value |
|---|---|
| First name | Contains the contacts first name. |
| Last name | Contains the contacts last name. |
| Phone | Contains the contacts mobile phone number. |
| Contains the contacts email address. | |
| Audiences | Contains the audiences to which the contacts will be added. |
| Tags | Contains a list of tags to attach to the contact separated by commas. (e.g. Happy, Purchased) |
| Tag Option | Determines what to do with the tags when the contact exists. |
NOTE: Minimum requirements for contact import are the first name and one contact method (Email or Mobile).